





TL;DR
- This blog is for engineering students, freshers, and first-time embedded learners in India who want to learn about STM32 microcontrollers from scratch without prior experience in microcontroller programming.
- STM32 is a range of 32 bit microcontroller chips from STMicroelectronics based on ARM Cortex M processor cores, and is one of the world’s most widely used 32bit microcontroller families.
- This guide is designed to explain the STM32 uses and family of chips (STM32F, STM32L, STM32H, STM32G, STM32WB, STM32WL series), as well as how to program an STM32 using STM32CubeIDE, and finally has two worked numerical examples included for exam preparation.
- It also elaborates on the context of India embedded technology based on STM32 used in the Indian industry, relevance of GATE & PSU exams and realistic salary expectations for embedded freshers.
- At the end of this, you will be able to select a board, configure STM32CubeIDE and see what is now happening in the chip when the code is executed.
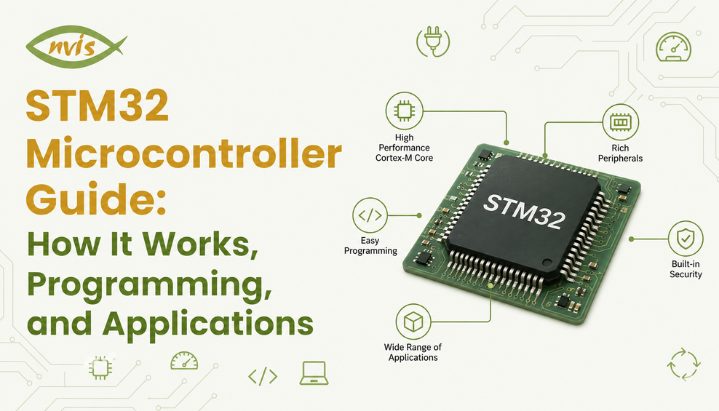
STM32 is a range of 32 bit microcontroller chips from STMicroelectronics based on ARM Cortex M processor cores. It is one of the most popular microcontroller platforms in use today in embedded systems applications ranging from the student robotics project to an industrial automation system or an automotive control unit. This guide explains the internal working of STM32 microcontroller, the difference between various series of STM32, how to program an STM32 using the STM32CubeIDE and the role of STM32 in engineering career and competitive exams in India.
Also read,
- Swinburne Test of DC Machine: Procedure & Working
- Ward Leonard Method of Speed Control: Working Principle, Advantages and Disadvantages
- Three Phase AC Voltage Controller Waveforms: Modes & Working
What Is an STM32 Microcontroller?
Consider the differences between your laptop and a smart washing machine. Your laptop is a general purpose computer. It can run a browser, edit a video, play a game, and hundreds of other things, depending upon what software you install. There’s another computer in a washing machine, but it’s very small, and it does just one thing: runs the washing cycle, detects water level, controls the washing machine motor, and sounds a beep when it’s finished. Does not require a screen, keyboard or browser.
The microcontroller that’s in the washing machine is a small, single-purpose computer. One particular, very popular family of that dedicated computer is the STM32.
An STM32 microcontroller, technically speaking, is a 32 bit embedded computing chip that is based on an ARM Cortex M processor core. An STM32 integrates a processor core, Flash memory, SRAM, and a range of input/output peripherals on a single chip. The firmware required for the application is stored in the microcontroller’s non-volatile memory, typically Flash, and is executed when the device starts. You program the chip and store the program in its built-in flash memory, after which the STM32 executes the program whenever the device is powered on, continuing until power is removed or the microcontroller is reset.
This single chip design is a big reason why you see STM32 microcontrollers everywhere: from fitness bands and electric scooter controllers to industrial sensors and drone flight controllers used in student projects.
Why STM32 and Not Just Any Microcontroller?
If you’ve ever programmed with Arduino boards, you’ve already been working in microcontroller mode. Many classic Arduino boards, such as the Arduino Uno, use 8-bit AVR microcontrollers. It is relatively easy to learn and remains a good starting point for beginners. However it is slower, has less memory, and fewer built-in peripherals.
An STM32, on the other hand, is a 32 bit chip. To illustrate, consider two students working on the same math problem. The numbers can be worked with one at a time, with constant carry-over. Others can perform with significantly higher numbers in a single operation. A 32-bit STM32 can process 32-bit data types efficiently and generally offers more processing capability than many classic 8-bit microcontrollers. However, performance also depends on clock speed, instruction set, memory architecture, peripherals, and the specific MCU.
Unlike most beginner boards, STM32 has a much more extensive range of built-in peripherals. Multiple timers, multiple communication interfaces (UART, SPI, I2C, CAN, USB), high resolution analog to digital converters, and in many models, hardware security features. This is why engineers are choosing STM32 microcontrollers to go beyond a hobby project and onto production grade embedded systems and why the term stm32 microcontroller is frequently mentioned in embedded systems job announcements and project reports.
However, STM32 is not beyond the reach of the newbie. STMicroelectronics offers no cost graphical configuration tools, and the many problems which a new user of this system will face have already been solved by a large community.
Inside an STM32: How It Actually Works
Open up an STM32 chip conceptually, and you will find four main building blocks working together. Understanding these four pieces is the real foundation of learning any stm32 microcontroller, because every tutorial, every CubeIDE setting, and every line of code eventually ties back to one of them.
Processor Core: Brain That Follows Instructions
At the center sits ARM Cortex M core. Picture a diligent assembly line worker who fetches one instruction at a time from program memory and executes exactly what it says: add these two numbers, check this condition, turn on this pin. That is what the processor core does, millions of times per second.
STM32 uses different variants of this Cortex M core depending on the series. Cortex M0 and M0+ are simplest and most power efficient, good for basic tasks like blinking LEDs or reading a single sensor. Cortex M3 offers a balanced middle ground. Cortex M4 adds digital signal processing and floating point math support, useful for motor control or audio work. Cortex M7 is a powerhouse, built for heaviest computational loads like real time image processing.
core also manages interrupts through a component called NVIC, or Nested Vectored Interrupt Controller. Think of an interrupt as a phone call that arrives while you are doing homework. You pause what you are doing, answer calls, then return to homework exactly where you left off. That is precisely how an STM32 handles a button press or an incoming data byte while running its main program loop.
Memory: Where Program and Data Live
Every STM32 has two main types of memory. Flash memory is like a notebook with permanent ink. Your compiled program is written here, and it stays even after power is switched off. SRAM stores temporary data such as variables, stack contents, and buffers while the program runs. Its contents are not retained when power is removed.
A typical entry level STM32F103 chip, for example, offers 64 KB of flash memory and 20 KB of SRAM. That sounds tiny compared to a laptop’s gigabytes, but for a dedicated task like reading a temperature sensor and controlling a fan, it is more than enough.
GPIO Pins: How Chip Talks to Outside World
GPIO stands for General Purpose Input Output, and these are physical legs of the chip that connect it to LEDs, buttons, motors, and sensors. STM32 groups these pins into ports labeled PA, PB, PC, and so on, with individual pins named PA0, PA1, PB5, and similar.
Each GPIO pin is flexible. It can be configured as a digital input to read a button press, a digital output to switch an LED, an analog input to measure a varying voltage, or an alternate function pin that hands control over to a built-in peripheral like UART or SPI. This flexibility is configured through the microcontroller’s software and peripheral configuration tools such as STM32CubeMX.
Clock System and Peripherals: Heartbeat and Toolkit
Every STM32 needs a clock signal, essentially a heartbeat that ticks at a fixed rate and tells every part of the chip when to move to the next step. STM32 chips can generate this clock internally or use an external crystal, and a Phase Locked Loop, or PLL, can multiply that base frequency up to chip’s maximum speed when more performance is needed.
Around this clock, STM32 wraps a rich set of peripherals, small specialized circuits that handle specific jobs so the main processor does not have to. Timers measure time intervals and generate PWM signals for motor speed control. An ADC, or Analog-to-Digital Converter, converts a real-world analog voltage, such as the output of a temperature sensor, into a digital value that the processor can use. UART, SPI, and I2C handle serial communication with other chips and modules. DMA, or Direct Memory Access, moves data between memory and peripherals without tying up the processor at all.
STM32 Family: Which Series Does What
STMicroelectronics does not make just one STM32 chip. It makes dozens, grouped into series, each tuned for a different job. Picking the right one is a lot like picking the right vehicle: a delivery scooter, a family sedan, and a cargo truck are all vehicles, but you would not use them interchangeably.
| Series | Cortex M Core | Best For | Typical Use Case |
| STM32F0 / F1 | M0 / M3 | Learning, general purpose control | Student projects, Blue Pill boards |
| STM32F4 | M4 | Performance with DSP and floating point | Motor control, audio, robotics |
| STM32H7 | M7 | Maximum computational power | Industrial automation, signal processing |
| STM32L | M0+ / M4 | Ultra low power | Battery powered IoT, wearables |
| STM32G | M0+ / M4 | Balanced performance and efficiency | Modern sensing and control systems |
| STM32WB / WL | M4 | Wireless connectivity built in | Bluetooth LE and other wireless connectivity |
STM32F1 series, home to the famous STM32F103C8T6 chip found on Blue Pill boards, is where most Indian students take their first step into STM32, largely because it is inexpensive and well documented. Once a learner is comfortable, moving to an STM32F4 for a robotics or drone project, or an STM32L series chip for a battery powered IoT device, becomes a natural next step.
Getting Started: STM32CubeIDE and Your First Program
Good news for beginners is that STMicroelectronics provides STM32CubeIDE as a free development environment for editing, compiling, programming, and debugging STM32 projects. STM32CubeMX is available separately for graphical device configuration and code generation is now available as a separate graphical configuration and initialization-code generation tool within the STM32Cube ecosystem. You do not need to buy Keil or IAR licenses to get started, though professional teams sometimes use those tools too.
Here is what the first time workflow looks like, step by step.
Step 1: Install STM32CubeIDE. Download it free from the official ST website and install it like any other application.
Step 2: Create a new project and select your chip. Select your STM32 device or board according to the development workflow you are using. STM32CubeMX can be used to configure the device, pins, clocks, and peripherals and generate the project files, which you can then build and debug using STM32CubeIDE.
Step 3: Configure your pins visually. Instead of writing low-level register configuration by hand, you can use STM32CubeMX to select pins and configure functions such as GPIO, ADC, UART, SPI, and other peripherals through a graphical interface, output, input, ADC, or a peripheral like UART. This step alone removes most of the intimidation factor that used to make microcontroller programming difficult for beginners.
Step 4: Set clock configuration. STM32CubeMX provides a graphical clock configuration view where you can configure the system clock and peripheral clock settings.
Step 5: Generate initialization code. STM32CubeMX can generate the low-level initialization code based on your pin, clock, and peripheral configuration. You can then open or import the generated project into your chosen development environment, such as STM32CubeIDE.
Step 6: Write your application logic. This is where you add your own code, typically inside a while(1) loop that runs forever. A classic first program toggles a GPIO pin connected to an LED, using HAL_GPIO_TogglePin() function along with HAL_Delay() to add a pause, creating a well known blinking LED result.
Step 7: Connect your ST Link programmer and flash code. Most STM32 development boards, including Nucleo series, have a built in ST Link programmer, so a single USB cable is all you need. Click the run button, and your compiled program is written directly into the chip’s flash memory.
Step 8: Debug if needed. STM32CubeIDE includes a built in debugger, letting you pause your program mid execution and inspect variable values in real time, which is invaluable when a sensor reading looks wrong and you need to find out why.
Worked Numerical Examples
Numerical problems on microcontrollers show up often in university lab exams and in GATE style objective questions. Here are two worked examples that reflect the kind of calculation you are likely to face.
Example 1: ADC Voltage Calculation
An STM32’s ADC is 12 bit, meaning it converts an analog voltage into a digital value between 0 and 4095. Suppose ADC reference voltage is 3.3 V, and a temperature sensor produces a raw ADC reading of 2048. What is the actual input voltage?
formula is:
Voltage = (ADC reading / Maximum ADC value) × Reference voltage
Voltage = (2048 / 4095) × 3.3 V
Voltage = 0.5001 × 3.3 V
Voltage ≈ 1.65 V
This makes sense intuitively too: 2048 is almost exactly half of 4095, so the result should land close to half of 3.3 V, which it does.
Example 2: PWM Frequency Calculation
STM32 timers generate PWM signals using two settings: Prescaler (PSC) and Auto Reload Register (ARR). Suppose the timer’s input clock is 72 MHz, prescaler is set to 71, and ARR is set to 999. What PWM frequency does this produce?
First, find timer’s counting frequency after prescaler divides it down:
Counting Frequency = Timer Clock / (PSC + 1)
Counting Frequency = 72,000,000 / (71 + 1) = 72,000,000 / 72 = 1,000,000 Hz (1 MHz)
Next, find PWM output frequency using ARR:
PWM Frequency = Counting Frequency / (ARR + 1)
PWM Frequency = 1,000,000 / (999 + 1) = 1,000,000 / 1000 = 1000 Hz
So this timer configuration produces a 1 kHz PWM signal, a common setting for controlling speed of a small DC motor or brightness of an LED.
STM32 in India: Boards, Pricing, and Where It’s Used
Cost is an important consideration for students, and low-cost STM32 development boards are widely available in India. The STM32F103C8T6 Blue Pill is a low-cost STM32 development board commonly used by students and hobbyists which is available in the market at a low price at various platforms such as Robu.in, Robocraze, Flipkart, etc., and provides an inexpensive way to experiment with an STM32F103C8T6 32-bit ARM Cortex-M3 microcontroller. Official STM32 Nucleo boards are shield compatible with Arduino, include a built-in STM32 programmer and are more expensive.
STM32 is used not only in student and hobby projects but also across several industrial applications in India. STM32 microcontrollers can be used in automotive, EV, industrial automation, consumer electronics, and IoT applications. India’s growth in EVs and electronics manufacturing is also increasing demand for embedded-system skills, although the use of a specific MCU family varies by company and product for EVs. STM32 devices are suitable for industrial automation applications such as controllers, monitoring systems, and human-machine interfaces (HMIs), although the specific MCU used varies by product and company. India’s growth in electronics manufacturing and government initiatives supporting electronics production are contributing to broader opportunities in embedded hardware and firmware. However, the impact varies by company and product.
STM32-based embedded development is not limited to one sector. Microcontrollers are used across industrial automation, automotive, consumer electronics, IoT, power systems, and other embedded applications, although the specific MCU family depends on the product and its requirements. However, the specific MCU families used by individual organizations and projects vary, so STM32 should not be presented as the standard platform across these organizations without a specific source. Organizations such as BEL and companies in the power sector use automation, monitoring, control, and embedded technologies. However, the specific microcontroller families used in their projects vary by system and application.
GATE, ISRO, DRDO and Exam Relevance
Microcontroller, digital electronics, computer organization, and embedded-system concepts are relevant to several engineering examinations and technical recruitment processes in India, and STM32 is practical, hands on face of concepts that otherwise stay purely theoretical.
For ECE students, GATE covers related areas such as digital circuits, data converters, semiconductor memories, and computer organization. These topics overlap with several STM32 fundamentals, although GATE does not require students to study the STM32 platform specifically. For ECE and EE students, this means questions on interrupts, timers, memory mapped I/O, and ADC principles, all of which map directly onto what you configure inside STM32CubeMX.
Some DRDO recruitment routes use GATE scores as part of the selection process, while requirements vary by post and recruitment notification. ISRO also uses recruitment processes that vary by post and recruitment cycle. Candidates should always follow the latest official notification and syllabus, including written tests and/or GATE-based shortlisting depending on the notification. ISRO recruitment uses its own selection process and technical assessment, so candidates should prepare according to the current recruitment notification and syllabus rather than assuming that it follows GATE’s pattern. Practical STM32 project experience can also help demonstrate hands-on embedded-system skills during technical interviews, although selection criteria vary by organisation and recruitment cycle.
For SSC JE and RRB JE aspirants, relevant electronics and digital-system fundamentals may overlap with topics such as digital electronics, basic circuits, and instrumentation, but candidates should follow the syllabus for their specific examination. Even if the exam itself does not name STM32 directly, understanding how a real microcontroller handles GPIO, interrupts, and communication protocols makes underlying digital electronics theory click far faster than memorization alone.
Career and Salary Guide for STM32/Embedded Freshers
STM32 experience is one of more direct paths from a college project to a paying embedded systems role in India, STM32 is a useful skill for embedded-systems candidates because job postings often mention it alongside ARM Cortex-M, C/C++, RTOS, and communication protocols.
For freshers with zero to two years of experience, embedded systems salaries in India typically range from roughly 3 to 6 LPA, though Strong STM32 projects can strengthen a fresher’s portfolio, particularly when they demonstrate practical skills such as peripheral configuration, communication protocols, debugging, and sensor interfacing. Some listings for embedded software and system engineer roles requiring STM32 alongside RTOS and Linux experience post significantly higher ranges, though these typically expect a few years of prior experience rather than being fresher friendly.
Job postings for embedded roles often list STM32 alongside skills such as C/C++, RTOS, ARM Cortex-M, and communication protocols such as UART, SPI, and I2C. Postings frequently ask for STM32 alongside ESP32 and other platforms like Nordic nRF and Silicon Labs, plus serial communication protocol experience, and roles often expect working knowledge of ARM Cortex based microcontrollers interfaced with memory, RTC, and sensors over SPI, UART, and I2C. This tells you the practical shape of a strong fresher resume: an STM32 project that actually talks to a sensor over I2C or SPI, sends data out over UART, and ideally saves data to some form of memory, generally demonstrates more practical ability than a basic blinking-LED demonstration.
Bengaluru, Pune, Hyderabad, Chennai, and other major technology and automotive hubs have significant embedded-systems activity, spanning industrial automation, automotive, and defence electronics employers. As experience grows, so does pay band, with mid level embedded engineers moving well past fresher range as they take on RTOS, driver level, and system architecture responsibilities.
Conclusion
An STM32 microcontroller is best understood not as an intimidating chip full of registers, but as a small, dedicated computer built to do one job reliably, using an ARM Cortex M core, on chip memory, GPIO pins, and a set of hardware peripherals that all work together. Once that mental model is in place, Tools such as STM32CubeMX can simplify initial device, pin, clock, and peripheral configuration through a graphical interface, while STM32CubeIDE provides the environment for developing, compiling, programming, and debugging the application.
For Indian students, the path forward is clear and inexpensive: pick up an STM32F103 Blue Pill or a Nucleo board, walk through blinking LED examples, then build one project that actually reads a sensor and talks to it over UART, SPI, or I2C. That project can reinforce practical concepts related to microcontrollers, digital systems, communication interfaces, and embedded programming, while also strengthening your embedded-systems resume while also becoming the centerpiece of your first embedded systems resume. Start with hardware you can afford today, and let projects grow from there.
FAQs
Yes. While STM32 has a steeper learning curve than Arduino, tools like STM32CubeIDE and STM32CubeMX handle most of low level setup visually, so a beginner can get a working project running without writing register level code. Starting with an inexpensive STM32F103 board and following a structured tutorial is a realistic first step for any engineering student.
Arduino refers to a development board and ecosystem, some of which use STM32 chips internally, while STM32 refers specifically to STMicroelectronics’ family of 32 bit ARM Cortex M microcontroller chips. STM32 generally offers more processing power, more memory, and more built in peripherals than 8 bit AVR chips used in classic Arduino boards, making it better suited for advanced or performance heavy projects.
Yes, a working knowledge of C is expected, since STM32 firmware is written almost entirely in C or C++. You do not need to be an expert, but you should be comfortable with variables, functions, pointers, and basic data types before starting STM32 development.
STM32F103C8T6 Blue Pill is the most common and affordable starting point for Indian students, widely available through Robu.in, Robocraze, and similar platforms. Students who want a built-in. programmer and easier debugging often prefer an official STM32 Nucleo board instead, at a somewhat higher price.
STM32 itself is generally not tested as a specific platform. However, working with STM32 can help students understand practical concepts such as GPIO, timers, interrupts, ADCs, memory, and communication interfaces. These concepts can complement preparation for relevant electronics and computer-organization topics.
STM32CubeIDE is STMicroelectronics’ free development environment for STM32 microcontrollers. It provides tools for editing, compiling, programming, and debugging STM32 projects. STM32CubeMX is available separately for graphical pin, clock, and peripheral configuration and code generation, covering the entire STM32 development workflow in a single free download.