





TL;DR
- This blog is for electronics, electrical, and instrumentation engineering students (and diploma students) who need digital electronics project ideas that actually build exam relevant and interview relevant skills, not just a list of buzzword titles.
- Most “digital electronics project ideas” lists online are either 100+ item link dumps with no technical depth or two line project abstracts that don’t explain what project actually teaches.
- This guide organizes 15 projects by difficulty tier (combinational logic, sequential logic, and microcontroller integrated systems), explains working principle and components behind each one, and walks through a full worked design example.
- A digital electronics project is only useful if you can explain its truth table, state diagram, or timing behavior in a viva or interview; picking a project for its title without understanding its logic defeats the purpose.
- Pick a project one level above your current comfort zone, build it on a trainer kit or breadboard before touching code, and be ready to justify every IC and every logical decision you made.
Also Read,
- Arduino for Embedded Systems Learning: Setting Up Your First Lab Project
- IoT Microcontroller Projects for Engineering Students: From Sensor to Cloud
- ARM Cortex M Microcontrollers Explained: Architecture for Embedded Engineering Students
What Fundamentals Should a Digital Electronics Project Actually Test?
Before picking a project, it helps to be clear on what digital electronics as a subject is actually built from, since every project on this list is really just an application of a small number of core ideas. Digital electronics deals with circuits that process information using discrete logic states, commonly represented as logic 0 and logic 1 and associated with defined voltage ranges. This is different from analog electronics, where a signal can take any value across a continuous range. One advantage of digital logic is that receivers interpret signals within defined voltage ranges as logic states, allowing some noise margin without changing the interpreted value. At the logic level, digital circuits can be represented using combinations of logic gates such as AND, OR, NOT, NAND, NOR, XOR, and XNOR, with Boolean algebra providing the mathematical framework for describing their behavior. Circuits are classified into two categories that matter for choosing a project. A combinational circuit produces an output that depends only on current input values, with no memory of past inputs; adders, multiplexers, and decoders fall into this category. A sequential circuit produces an output that depends on both current inputs and circuit’s past state, which requires memory elements called flip flops; counters, registers, and finite state machines fall here. This distinction is the reason the project list below is split into combinational and sequential tiers. Combinational circuits are simpler to design, debug, and explain, since there is no timing or clock behavior to reason about. Sequential circuits add complexity of clocking, state transitions, and timing diagrams, which is exactly why they represent the next skill level up.How to Choose a Digital Electronics Project Based on Your Skill Level
A project is worth building only if it stretches you slightly beyond what you already know how to design. A student who has only wired basic logic gates should not jump straight into a microcontroller based digital voltmeter, and a student already comfortable with counters and shift registers gets little out of building yet another logic gate demonstration. The beginner tier below assumes familiarity with Boolean algebra and basic gate ICs (74 series family such as 7400, 7408, 7432, and 7486) and no prior exposure to sequential circuits. The intermediate tier assumes comfort with flip flops (7474, 7476) and requires understanding of clock signals and state transitions. Advanced tier assumes both of the above plus basic microcontroller programming, typically on an 8051, AVR, or Arduino platform, since several practical digital systems today combine hardwired logic with software controlled logic for flexibility. Two other decisions shape which project fits: whether you build on a breadboard with discrete ICs or use a digital IC trainer kit with a built in power supply, ZIF sockets, and I/O indicators, and whether final submission needs to be a standalone hardware circuit or can include a microcontroller based implementation. Academic evaluators generally reward projects that make underlying logic visible, so a project built from discrete gate and flip flop ICs, where every connection can be traced and explained, tends to demonstrate stronger fundamentals than the same function implemented as a few lines of microcontroller code.Beginner Projects: Combinational Logic Circuits
These five projects use only logic gates and combinational building blocks. No clock signal or memory element is involved, which keeps debugging straightforward: a wrong output always traces back to a wrong gate connection or an incorrect truth table implementation.1. Full Adder and Full Subtractor Circuit
A full adder is a fundamental building block used in many digital arithmetic circuits, including adders and arithmetic units such as ALUs. It takes three single bit inputs, two operands and a carry in from a previous stage, and produces a sum and a carry out. Building it from individual XOR, AND, and OR gates, rather than using a ready made adder IC, forces you to derive sum and carry expressions from truth table yourself: Sum = A ⊕ B ⊕ Cin, and Carry out = AB + BCin + ACin. A full subtractor follows the same pattern with borrow logic instead of carry logic. Cascading four full adders builds a 4 bit parallel adder, a natural extension that demonstrates how larger arithmetic circuits are built from repeated smaller units.2. BCD to Seven Segment Display Decoder
This project converts a 4 bit binary coded decimal (BCD) input into seven output signals needed to light correct segments of a seven segment display. core learning value is in constructing truth tables and deriving Boolean expressions for each of seven segment outputs, then simplifying them using Karnaugh maps before wiring the circuit. Students frequently first build this project by hand using discrete gates, then rebuild the same function using a dedicated decoder IC such as 7447, which makes the value of using purpose built ICs concrete rather than theoretical.3. Multiplexer Based Data Selector
A multiplexer (MUX) selects one of several input lines and routes it to a single output line, based on the value of select lines. A 4 to 1 MUX project (using an IC such as 74153) demonstrates how select line combinations govern which input reaches output, and is a natural lead in to implementing arbitrary Boolean functions using MUX based logic, a technique that appears directly in GATE level digital circuit design questions.4. Priority Encoder for Interrupt Handling
An encoder converts one of several input lines into a corresponding binary code. A basic encoder assumes that only one input is active at a time, while a priority encoder can handle multiple active inputs by assigning priority to one of them. A priority encoder adds a rule that if multiple inputs are active simultaneously, only the highest priority input’s code is output. This project models exactly how interrupt controllers in real processors decide which of several simultaneous interrupt requests to service first, which makes it a good bridge project between pure digital logic and computer organization concepts.5. Digital Magnitude Comparator
A comparator circuit takes two multi bit binary numbers and determines whether first is greater than, less than, or equal to second, using cascaded XOR and gate logic (implemented in ICs such as 7485). Building a 4 bit comparator and then cascading two of them to compare 8 bit numbers demonstrates the same expandability principle seen in full adder projects, and reinforces how larger digital systems are constructed from smaller repeatable blocks.Intermediate Projects: Sequential Logic Circuits
These five projects introduce flip flops, clocking, and state behavior. Unlike combinational circuits, a working sequential circuit needs correct clock edge triggering (positive edge, negative edge, or level triggering), and debugging often means reading a timing diagram rather than a truth table.6. Mod N Synchronous Counter
A synchronous counter increments its count on every clock pulse, with all flip flops triggered by the same clock signal simultaneously, which avoids propagation delay problems of an asynchronous (ripple) counter. A Mod N counter counts from 0 to N−1 and then resets, rather than counting through the full range available from its flip flops. This is one of most commonly assigned sequential logic projects because designing one from scratch requires working through a state table, deriving flip flop excitation equations, and verifying design against a timing diagram, which is a precisely designed process tested in GATE and PSU technical interviews. A full worked example for designing a Mod 6 counter follows in the next section.7. Traffic Light Controller Using Counters and Decoders
A traffic light controller is a finite state machine (FSM) that cycles through a fixed sequence of states (red, red yellow, green, yellow) with different durations for each state, typically implemented using a counter to track time within each state and a decoder to translate counter’s output into correct combination of LED outputs. This project is popular precisely because it takes an everyday system and reduces it to explicit states and transitions, and it scales naturally: a basic two way intersection can later be extended to a four way intersection with pedestrian signals, which is a common way to differentiate a project during evaluation.8. Digital Clock Using Counter ICs
A digital clock built from counter ICs (typically 7490 decade counters or 74192 up/down counters) rather than a microcontroller demonstrates cascaded counting with modulus conversion: seconds and minutes need Mod 60 counters, while hours need a Mod 12 or Mod 24 counter, each requiring different reset logic. The project can also introduce multiplexed seven-segment display driving. In multiplexing, the digits are switched rapidly one at a time so that they appear continuously lit to the human eye, reducing the number of driver lines required.9. Shift Register Based Serial to Parallel Converter
A shift register stores and shifts binary data one bit at a time on each clock pulse, using cascaded flip flops (commonly 74164 or 74195 IC family). A serial to parallel converter project takes data arriving one bit at a time on a single line and, after the correct number of clock pulses, makes the entire word available on parallel output lines simultaneously. This project demonstrates the shift-register and serial-data concepts used in serial communication systems such as UART and SPI, which makes it a strong bridge into embedded systems and communication engineering topics.10. Frequency Divider Circuit
Each flip flop in a cascaded chain divides input clock frequency by two, since a flip flop toggles its output once for every two clock pulses at its input. A frequency divider project chaining four flip flops to divide a given clock frequency by 16, and displaying or measuring resulting frequency, is a compact project that reinforces both flip flop toggling behavior and frequency domain thinking, which carries over directly into timer and clock management topics in microcontroller based systems.Advanced Projects: Microcontroller Integrated Digital Systems
These five projects combine digital logic concepts with microcontrollers, ADCs, sensors, and embedded programming. They are useful for students who want to extend their digital electronics fundamentals into embedded and practical system design.11. Digital Voltmeter Using ADC and Microcontroller
This project uses an analog to digital converter (ADC0808 or microcontroller’s built in ADC) to sample an analog voltage, converts digital reading into a displayable value, and shows it on a seven segment or LCD display. The core digital electronics concept being tested is resolution: For an ideal 8-bit ADC with a given reference range, the nominal LSB size is approximately the reference range divided by 256. Practical ADC resolution also depends on factors such as quantization, noise, reference accuracy, and ADC architecture. Understanding this resolution limit, and how it changes with a 10 bit or 12 bit ADC, is a concept that shows up repeatedly in both academic exams and instrumentation focused PSU interviews.12. Bidirectional Visitor Counter with Automatic Room Light Control
This project uses two IR sensor pairs positioned to detect direction of movement (whether a person entered or exited a room) and drives an up/down counter accordingly, while also switching room lighting on or off automatically based on whether count is greater than zero. direction sensing logic, determining which of two sensors is triggered first, is a genuinely instructive part of this project, since it requires a small state machine of its own to disambiguate entry from exit reliably.13. Digital Code Lock Using Flip Flops or Microcontroller
A digital code lock accepts a sequence of button presses and only unlocks (activates a relay or LED) if the sequence matches a pre-set combination in correct order. A flip flop based implementation uses a sequence of D flip flops, each enabling next only if the previous stage matched correctly, which is a clean demonstration of sequential logic used for a genuinely practical purpose. A microcontroller based version replaces flip flop chains with a stored sequence compared in software, which is worth building alongside hardware versions specifically to compare two design approaches to the same problem.14. Elevator Controller Using a Finite State Machine
An elevator controller project models an elevator’s behavior (idle, moving up, moving down, door open) as an explicit finite state machine, with transitions triggered by floor call button presses. This project is more demanding than a basic traffic light controller because its state transitions depend on inputs such as floor requests, the elevator’s current position, and its current operating state rather than following one fixed sequence, closer to how a general purpose sequential controller is actually designed in industry. It is a strong final year project specifically because FSM design (state diagram, state table, and next state logic) can be defended in detail during evaluation.15. UART Based Digital Communication Module
Building a basic UART (Universal Asynchronous Receiver Transmitter) transmitter and receiver pair, either from discrete shift registers and timing logic or using a microcontroller’s built in UART peripheral, ties together frequency division (for baud rate generation), shift registers (for serial to parallel and parallel to serial conversion), and start/stop bit framing. Understanding UART at this level of detail is directly useful, since serial communication debugging is a routine task in embedded systems roles across PSUs and private sector electronics companies.Worked Example: Designing a Mod 6 Synchronous Counter
Since a Mod N counter appears repeatedly across the project list above and is also a standard GATE and PSU interview design question, working through the design process end to end is worth doing in full. Problem: Design a Mod 6 synchronous counter using JK flip flops that counts 0, 1, 2, 3, 4, 5, and then resets to 0. Step 1: Determine the number of flip flops needed. A counter needs enough flip flops to represent all required states. With n flip flops, 2ⁿ states are available. Since Mod 6 requires 6 states (000 to 101 in binary), and 2² = 4 is insufficient while 2³ = 8 is sufficient, three flip flops (labeled Q2, Q1, Q0) are required, with states 110 and 111 left unused. Step 2: Write a state transition table. counter cycles through states 000 → 001 → 010 → 011 → 100 → 101 → 000. For each flip flop, note its present state and required next state at every transition. Step 3: Derive JK excitation table for each flip flop. For a JK flip flop, excitation rules are: to hold state 0 → 0, J = 0 and K = don’t care (X); to transition 0 → 1, J = 1 and K = X; to transition 1 → 0, J = X and K = 1; to hold state 1 → 1, J = X and K = 0. Applying these rules to every bit at every transition in the state table produces required J and K inputs for Q0, Q1, and Q2 at each of six states. Step 4: Simplify using Karnaugh maps. Plotting each of six J and K input values (J0, K0, J1, K1, J2, K2) against present states Q2Q1Q0 on separate Karnaugh maps, and grouping resulting 1s and don’t care cells, gives simplified Boolean expressions. One valid simplification, when the unused states 110 and 111 are treated as don’t-care conditions, is J0 = 1, K0 = 1, J1 = Q0, K1 = Q0, J2 = Q1Q0, and K2 = Q0. The resulting circuit produces the required 000 → 001 → 010 → 011 → 100 → 101 → 000 sequence from the valid states. However, because the unused states are treated as don’t-cares, the resulting behavior from 110 and 111 should be checked separately. These equations produce the required sequence 000 → 001 → 010 → 011 → 100 → 101 → 000, though “don’t care” cells for unused states 110 and 111 mean more than one valid simplification exists, and any correct simplification is acceptable as long as it produces required sequence. Step 5: Wire circuit and add reset logic. Connect derived expressions to J and K inputs of three flip flops, all sharing a common clock line for synchronous operation. Because 110 and 111 are unused states, the design should also define how the circuit behaves if it enters either state. A reset or recovery condition can be added to force the counter back to 000, or the unused states can be assigned transitions that return the counter to the valid sequence. This same five step process, determine flip flop count, build state table, derive excitation equations, simplify with Karnaugh maps, and add reset logic, applies to designing any Mod N counter, and understanding it thoroughly is what separates a student who can only wire a pre designed circuit from one who can design a new sequential circuit from a specification.Tools You Need to Build These Projects
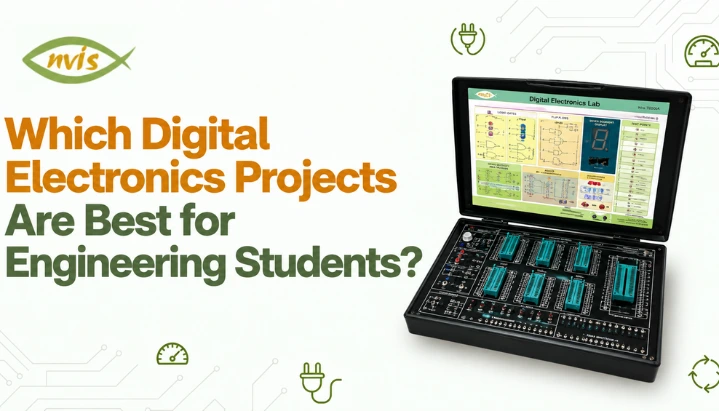
A breadboard with jumper wires and individually purchased ICs works for combinational projects, but sequential and microcontroller integrated projects benefit from more structured lab equipment, since debugging a clocked circuit on loose breadboard connections is disproportionately harder than debugging a static combinational circuit. A digital IC trainer kit, such as NV6550 Digital IC Trainer, provides a regulated power supply, ZIF sockets for quick IC insertion without bent pins, and built in input switches and output LED indicators, which removes a significant source of project failures that have nothing to do with underlying digital logic, loose wires, wrong voltage levels, or a bent IC pin, and lets debugging time go toward actual circuit design instead. For projects spanning combinational circuits (adders, decoders, multiplexers), sequential circuits (flip flops, counters, registers), and display interfacing (BCD to seven segment decoding), a trainer kit built specifically around these building blocks covers most of beginner and intermediate project list above on a single piece of lab equipment. For microcontroller integrated tier, an additional development board (an 8051 or AVR trainer kit, or an Arduino board) and a basic understanding of embedded C or Arduino programming are needed alongside digital logic fundamentals, since these projects deliberately combine both skill sets.Digital Electronics and Competitive Exam Relevance
Digital electronics is one of core subjects in GATE Electronics and Communication Engineering (ECE) and Electrical Engineering (EE) syllabi, covering number systems, Boolean algebra and logic gate minimization, combinational circuit design, and sequential circuit design including flip flops, counters, and registers. Students preparing for GATE ECE or EE benefit directly from having actually built combinational and sequential circuits rather than only having studied them on paper, since the digital-circuit topics tested in GATE include combinational and sequential logic, flip-flops, counters, registers, and related design concepts, making the Mod 6 counter a useful practical example of these fundamentals. For SSC JE and RRB JE, the exact treatment of digital electronics depends on the examination and discipline. For example, the current RRB JE Electronics & Allied Engineering syllabus explicitly includes digital electronics topics such as number systems, Boolean algebra, logic gates, combinational and sequential circuits, ADC/DAC, counters, and memories. Students should check the notification for their specific recruitment cycle. That said, Technical interviews for electronics, instrumentation, and embedded roles may ask candidates to explain projects they have built, including their truth tables, timing diagrams, state transitions, or implementation choices, which makes projects on this list relevant for interview preparation even where they are not directly tested in a particular exam’s written syllabus. Candidates should verify the current syllabus on official SSC and RRB notifications before assuming any subject’s exact weightage, since exam patterns are revised periodically.Career Pathways Where These Skills Are Used
Digital electronics fundamentals can be relevant to entry-level roles in electronics, instrumentation, hardware testing, and embedded systems across public-sector and private-sector organisations. The specific skills and eligibility requirements vary by organisation and recruitment cycle. Digital electronics skills can support entry-level opportunities in areas such as hardware testing, embedded systems, electronics design, and instrumentation. Specific roles and eligibility requirements vary by organization and recruitment cycle, so students should check current official job notifications before relying on specific eligibility criteria or recruitment details. In private sector, digital design skills transfer into embedded systems engineer, hardware design engineer, and test engineer roles across electronics manufacturing and semiconductor industries, where ability to read a datasheet, design a state machine, and debug a timing diagram remains a practical, non negotiable skill regardless of how much of actual circuit design has moved into FPGAs and programmable logic in modern products.Comparing Three Project Tiers
| Aspect | Beginner (Combinational) | Intermediate (Sequential) | Advanced (Microcontroller Integrated) |
| Core concept tested | Boolean logic, gate level design | Clocking, state transitions, memory | Digital logic combined with embedded programming |
| Typical components | Logic gate ICs (7400 series), MUX/decoder ICs | Flip flop ICs, counter ICs, shift registers | Microcontroller board, ADC, sensors, plus logic ICs |
| Debugging method | Truth table verification | Timing diagram analysis | Combination of code debugging and hardware timing checks |
| Design skill demonstrated | Boolean simplification (K maps) | State table design, excitation equations | System level integration of hardware and software |
| Recommended tool | Breadboard or digital IC trainer kit | Digital IC trainer kit with clock source | Trainer kit plus microcontroller development board |
Which Digital Electronics Project Should You Actually Build?
Start with a project from the tier that matches your current comfort with Boolean algebra and gate ICs, not the tier that sounds most impressive on a project report cover page. A well built full adder circuit that you can explain gate by gate demonstrates more engineering understanding to an evaluator or interviewer than a microcontroller based system you copied from a tutorial without following underlying logic. Work through the Mod 6 counter design process on paper for whichever sequential project you choose, since that five-step design method develops the systematic reasoning used in digital-logic exam problems, technical interviews, and hardware design. Build on a proper digital IC trainer kit where possible, since it removes wiring related failures that have nothing to do with your circuit design and lets you focus debugging time on logic itself.FAQs
What is the difference between a digital electronics project and an embedded systems project?
A digital electronics project focuses on circuits built from logic gates, flip flops, and related ICs, where behavior is fixed by hardware wiring. An embedded systems project uses a microcontroller running software to implement similar or more complex behavior. Several projects on this list, including digital code lock and UART module, can be built either way, which is a useful exercise for understanding trade offs between two approaches.
Do I need to know microcontroller programming to do a digital electronics project?
No. beginner and intermediate tiers above, covering combinational circuits and sequential circuits like counters and shift registers, use only logic gate and flip flop ICs and require no programming knowledge. Programming becomes necessary only for advanced, microcontroller integrated tier.
Which digital electronics project is best for a final year project?
A project with genuine design decisions, such as an elevator controller or traffic light controller, can give you more material to explain during a final-year evaluation, including its state diagram, transition logic, and implementation choices. A finite state machine also gives you a clear design process to explain during your viva, rather than focusing only on the final output.
Are digital electronics projects still relevant given how much design has moved to FPGAs and programmable logic?
Yes. FPGA and programmable logic design still requires understanding the same combinational and sequential logic fundamentals, number systems, Boolean simplification, flip flop behavior, and state machine design, that these discrete IC projects teach. The implementation platform has changed in industry, but underlying digital logic concepts have not.
What is the most common mistake students make when building sequential circuit projects?
Wiring flip flops without accounting for clock edge triggering correctly, mixing positive edge triggered and negative edge triggered ICs in the same circuit, or without a shared clock line across all flip flops in a synchronous design. This produces a circuit that behaves unpredictably even though every individual connection looks correct, which is why understanding timing diagrams matters as much as understanding truth tables.
How is digital electronics tested differently in GATE versus SSC JE or RRB JE?
GATE ECE and EE test digital electronics through numerical design problems, such as deriving flip flop excitation equations or simplifying Boolean expressions using Karnaugh maps. The exact depth and coverage of digital electronics vary by examination and discipline. For example, the current RRB JE Electronics & Allied Engineering syllabus explicitly includes combinational and sequential logic, counters, ADC/DAC and memories, focusing more on general electrical and basic electronics fundamentals, though underlying knowledge still helps in PSU technical interviews where candidates are asked to explain projects they have built.


