





TL;DR
- This blog is for ECE, EEE, and CSE students, freshers, and exam aspirants who want to understand how an Arduino embedded system works and set up their first hands-on lab project.
- Arduino board itself is more accurately described as an embedded development platform.
- A proper Arduino embedded system setup needs the right board, Arduino IDE, correct driver installation, and one working baseline project before adding sensors.
- A worked numerical example on LED resistor calculation and PWM duty cycle shows how classroom formulas map directly onto real Arduino code.
- Building even one solid Arduino project strengthens GATE, SSC JE, and RRB JE embedded systems answers, and gives freshers something concrete to show in interviews at PSUs and private embedded companies.
Every electronics student eventually asks the same question. Is Arduino embedded system technology, or is it something separate that sits next to embedded systems in a textbook? The confusion is understandable because many courses introduce embedded systems through microcontrollers such as the 8051 or PIC, while practical labs may then introduce Arduino without clearly explaining how the two relate.
This blog answers that question directly and then walks through setting up your first Arduino based embedded system lab project from scratch. You will learn what happens inside the board, how to install software correctly, and how to wire and code your first working circuit. Along the way, you will work through calculations useful for GATE and SSC JE-style questions, along with India specific career context that most tutorials skip entirely.
By the end, you will have a working lab setup and a clear mental model of where Arduino fits in the broader embedded systems landscape.
Also read,
- 8051 Microcontroller: Architecture, Pins, Working & Uses
- STM32 Microcontroller Guide: How It Works, Programming, and Applications
- IoT Microcontroller Projects for Engineering Students: From Sensor to Cloud
Is Arduino an Embedded System?
Arduino boards are embedded development platforms based on microcontrollers, and they can be used to build embedded systems for specific tasks. Understanding the role of the Arduino board and its microcontroller helps clarify the difference.
An embedded system is a combination of hardware and software designed to perform a specific function. For example, a washing machine contains a controller that manages functions such as wash cycles, drum movement, and alerts. It is designed for a dedicated purpose rather than general-purpose computing.
An Arduino board contains a microcontroller that provides the processor, memory, and input-output capabilities required to control connected hardware. On the classic Arduino Uno, the microcontroller is the ATmega328P. When a program is uploaded to the board and components such as sensors, LEDs, or motors are connected, the Arduino can be used to build an embedded system.
However, an Arduino board is more accurately described as an embedded development platform built around a microcontroller. It provides a ready-made hardware and software environment that simplifies the development of embedded applications, particularly for beginners and students.
Therefore, Arduino is best understood as a development platform used to create and learn embedded systems, rather than as a separate category that competes with embedded systems. It allows users to work with real microcontroller hardware without designing a custom circuit board from the beginning.
Arduino vs Traditional Embedded Systems Development
Once you understand Arduino as an embedded development platform, the next useful question is how it compares to the traditional route of embedded systems learning.
In a conventional bare-metal workflow, you may program an 8051 or PIC directly using C or assembly, configure peripherals through registers, and use a programmer or debugger to load and test the firmware, configure peripherals through registers, and use a programmer or debugger to load and test the firmware. This teaches you exactly what is happening at hardware level, but the learning curve is steep for a first year student.
Arduino removes several of these early barriers. The board already has a USB interface, a voltage regulator, and a pre-loaded bootloader that lets you upload code with one click. Arduino IDE hides much of low level register configuration behind simple functions like pinMode and digitalWrite. You still write in C or C++, so programming logic you learn transfers directly to professional embedded work later.
This is why Arduino can be a useful starting point before moving to platforms such as STM32 or bare-metal AVR programming. You get real embedded hardware experience quickly, then dig deeper into register level control once fundamentals are solid.
| Aspect | Arduino Development | Traditional Bare Metal (8051/PIC) |
| Programming language | C/C++ with simplified functions | C or Assembly with direct register access |
| Upload method | USB, one click upload | External programmer/burner required |
| Learning curve | Gentle, beginner friendly | Steep, needs hardware register knowledge |
| Cost to start | Low, single board around Rs 500 to Rs 900 | Board plus separate programmer needed |
| Best suited for | Beginners, rapid prototyping, hobby and lab projects | Students learning register level architecture, production design |
| Industry relevance | Prototyping, IoT, hobbyist and academic projects | Automotive, industrial, and safety critical production systems |
What You Need for Your First Arduino Embedded System Setup?
Before touching any code, gather physical components. A cluttered or incomplete lab setup is the most common reason first projects fail.
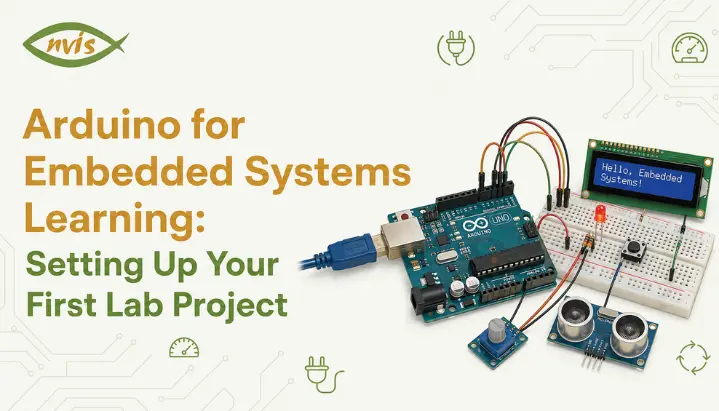
For a basic arduino embedded system setup, you need an Arduino Uno board, which is the most widely supported and documented option for beginners. You also need a USB cable, typically USB Type B on the original Uno, to connect the board to your laptop. A breadboard and a small set of jumper wires let you build circuits without soldering. Finally, keep a few basic components on hand, an LED, a 220 ohm resistor, and a push button, since almost every early tutorial uses these.
Budget wise, a genuine Arduino Uno costs more, but clone boards using the same ATmega328P chip are widely available in India through electronics markets like Lamington Road in Mumbai, SP Road in Bengaluru, or online sellers, usually priced between Rs 400 and Rs 700. For a first lab project, a reputable Arduino-compatible clone can be a cost-effective option, although USB interfaces, component quality, and driver requirements can vary between boards.
Software wise, you only need Arduino IDE, which is free and available for Windows, macOS, and Linux. There is no need for a separate compiler or an external programmer device, which is one of the biggest practical advantages Arduino offers over other microcontroller platforms.
Installing and Configuring Arduino IDE
With hardware in hand, the next step is getting your development environment ready. This is where many beginners get stuck, usually on driver installation rather than software itself.
Download Arduino IDE from the official Arduino website and install it using the standard installer for your operating system. Once installed, connect your Arduino board to your computer using USB cable. Windows will often detect a genuine Arduino automatically, although driver or USB-port issues can still prevent recognition. Clone boards often use a CH340 USB to serial chip instead of the original chip, and Windows sometimes needs a separate CH340 driver installed manually before the board is recognized.
After installation, open Arduino IDE and go to Tools, then Board, and select Arduino Uno from the list. Next, go to Tools, then Port, and select the COM port your board appears under. On Windows this typically looks like COM3 or COM4. On Linux or macOS, it usually appears as something like /dev/ttyUSB0 or /dev/cu.usbmodem.
To confirm everything works, open File, then Examples, then 01.Basics, then Blink. Click the checkmark icon to compile code, then click the arrow icon to upload it. If the onboard LED starts blinking once every second, your Arduino embedded system setup is complete and ready for real projects.
Your First Real Project: LED Control with a Push Button
Blinking built in LED confirms your setup works, but it does not teach interaction. A slightly more meaningful first lab project is controlling an LED using a push button, since it introduces both digital input and digital output in one circuit.
Build circuit by connecting LED’s longer leg through a 220 ohm resistor to digital pin 13, and shorter leg to GND. Connect one leg of the push button to digital pin 2, and the other leg to GND. Using INPUT_PULLUP mode in code avoids the need for an external pull up resistor on button, which simplifies wiring for a first attempt.
const int buttonPin = 2;
const int ledPin = 13;
int buttonState = 0;
void setup() {
pinMode(ledPin, OUTPUT);
pinMode(buttonPin, INPUT_PULLUP);
}
void loop() {
buttonState = digitalRead(buttonPin);
if (buttonState == LOW) {
digitalWrite(ledPin, HIGH);
} else {
digitalWrite(ledPin, LOW);
}
}
Here is what happens line by line. setup function configures pin 13 as an output for LED and pin 2 as an input with its internal pull up resistor enabled. Inside the loop, digitalRead constantly checks the button’s state. Because of the pull up configuration, the pin normally reads HIGH, and pressing the button pulls it to LOW by connecting it to ground. When code detects LOW, it turns the LED on, and otherwise keeps it off.
This project matters more than it looks. It demonstrates a core embedded systems loop of reading an input, processing a condition, and driving an output, which is exactly the pattern used in far more complex systems, from an elevator controller to an EV battery management system.
Worked Example LED Resistor and PWM Calculation
GATE and SSC JE questions on embedded systems often test whether you can apply basic circuit laws inside a microcontroller context, not just recall definitions. Here is a worked example that combines both.
Problem: An LED with a forward voltage of 2V and a required forward current of 15mA is connected to an Arduino digital pin that outputs 5V. Calculate the required resistor value. Then, if this LED is dimmed using PWM with a duty cycle of 40 percent, calculate its average voltage across the LED.
Step 1: Resistor calculation using Ohm’s Law
The resistor must drop the difference between supply voltage and LED’s forward voltage.
Voltage across resistor = Supply voltage − LED forward voltage
= 5 V − 2 V
= 3 V
Resistance = Voltage across resistor divided by required current Resistance = 3V divided by 0.015A = 200 ohms
Since 200 ohm is not a standard resistor value, the nearest standard value, 220 ohm, is used in practice, which slightly reduces current for safety margin.
Step 2: Average voltage under PWM
PWM does not change peak voltage. Instead, it switches pins on and off rapidly, and PWM controls LED brightness by rapidly switching the Arduino output between 0V and 5V. The duty cycle determines the proportion of time the LED is powered during each cycle. This proportion is called duty cycle.
For a simplified PWM calculation, the average Arduino output voltage is:
Average output voltage = Duty cycle × Supply voltage
= 0.40 × 5 V
= 2 V
This means at 40 percent duty cycle, LED experiences an effective average voltage of 2V, which is why it appears noticeably dimmer than at full brightness, even though actual pin voltage is still switching between 0V and 5V.
This type of numerical combines basic Ohm’s Law with the concept of PWM duty cycle, making it useful practice for electronics and embedded-systems fundamentals.
India Specific Context for Arduino Skills
Arduino experience by itself will not get you a government job, but concepts it teaches map directly onto how embedded systems are tested and used across Indian industry and PSUs.
Organizations such as ISRO, DRDO, BEL, BHEL, and HAL recruit engineers for a range of electronics, electrical, control, embedded, and related technical roles. Arduino projects can provide an early foundation in concepts such as GPIO, sensors, control logic, and microcontroller programming, although production systems use more specialized hardware and development processes. An Arduino project can help students begin developing some of the underlying skills used in these fields. While these organizations use industrial-grade microcontrollers and stricter development processes in production, the underlying logic of reading sensors, applying control conditions, and driving actuators is conceptually similar to what a student learns by wiring an LED and a button to what a student learns by wiring an LED and a button.
On the private-sector side, India’s electric-vehicle industry has created demand for engineers working on embedded systems for areas such as battery management, motor control, and vehicle electronics. Understanding microcontroller-based control systems provides a useful foundation because many EV subsystems rely on embedded control principles. Similarly, India’s Production Linked Incentive scheme for electronics manufacturing has pushed more companies toward in house embedded product design rather than only assembly work, increasing demand for engineers comfortable with hands-on microcontroller development.
For freshers, a portfolio built around genuine Arduino projects, not just tutorials copied without understanding, signals to interviewers that you can move from theory to a working circuit. That single differentiator often matters more in interviews than which specific board or platform you used.
GATE, SSC JE, and RRB JE Exam Relevance
Microcontroller, digital-electronics, and interfacing concepts appear in some technical examination syllabi. Candidates should check the current official syllabus for the specific exam, and Arduino-based learning can reinforce some of the underlying concepts tested in these exams, even though the exams themselves may not mention Arduino by name.
GATE ECE covers relevant digital-system, electronic, and computer-architecture concepts, while the exact treatment of microprocessors, microcontrollers, and interfacing depends on the current syllabus. Learning these concepts through Arduino can make the underlying hardware concepts easier to understand. GATE papers related to electronics and instrumentation cover several concepts that can be reinforced through hands-on microcontroller projects.
For SSC JE Electrical preparation, Arduino can help students strengthen basic electronics and digital concepts through hands-on practice, although the exam syllabus should be followed directly for topic coverage. For RRB JE and other technical recruitment exams, the relevance of microcontroller and embedded concepts depends on the specific discipline and current syllabus rather than platform specific trivia.
The practical advantage of having built even one working Arduino project is that abstract exam topics like ADC resolution, PWM duty cycle, or interrupt handling stop being memorized definitions and become things you have actually observed happening on a breadboard. This noticeably improves both recall speed during exam and confidence during any follow up viva or interview round.
Career and Salary Outlook for Embedded Systems Engineers in India
Embedded systems remains one of more stable and steadily growing career paths for ECE and EEE graduates in India, and starting with Arduino is a legitimate first step toward it.
Freshers entering embedded roles typically start in the range of Rs 4 LPA to Rs 8 LPA at automotive component makers, semiconductor companies, and product engineering firms, with service based companies often on the lower end of that range and specialized product companies on the higher end. Engineers who qualify through GATE and are recruited by organizations such as DRDO for Scientist B positions can start at the Level-10 pay scale, with the basic pay listed at Rs 56,100, alongside strong long term growth and job security. With three to five years of experience, embedded engineers commonly move into the Rs 8 LPA to Rs 15 LPA range, and specialization in automotive embedded systems, particularly around AUTOSAR and CAN protocols for growing the EV and automotive sector, can push packages considerably higher.
The field particularly rewards engineers who combine software skills like C and C++ with genuine hardware understanding, exactly the combination that hands on Arduino based learning builds from the very first lab session. As India’s semiconductor and EV manufacturing base expands under central government incentive schemes, demand for engineers who can comfortably move between code and circuit is likely to keep growing faster than supply of such talent.
Conclusion
Arduino is an embedded development platform built around a microcontroller and can be used to create real embedded systems. Treating it as a practical starting point for embedded learning helps you build fundamentals before moving to more advanced platforms. Setting up your first arduino embedded system lab project, from installing IDE correctly to wiring your first button controlled LED, teaches the basic pattern of reading an input, processing the result, and controlling an output that appears in many embedded systems you will encounter later, from industrial PLCs to EV battery controllers.
Combine that hands-on foundation with exam specific numerical practice and India specific career context covered here, and you have a genuinely well rounded starting point, whether your goal is a GATE rank, a PSU interview, or your first embedded engineering job. Set up your board today, build button LED projects yourself, and treat every future circuit as one more step toward a stronger embedded systems foundation.
FAQs
Is Arduino considered a real embedded system or just a learning tool?
An Arduino-based setup can function as an embedded system when the board, program, and connected hardware are designed to perform a specific task. It is also an excellent learning tool, but these two things are not contradictory, since the board itself contains a real microcontroller doing real embedded work.
Do I need prior programming knowledge before starting arduino embedded system setup?
No prior programming experience is required. Arduino uses a simplified version of C/C++, and most beginners learn programming concepts alongside electronics concepts through guided projects like ones covered in this blog.
Which Arduino board is best for a first embedded systems lab project?
Arduino Uno is a recommended starting board because it has a large amount of tutorials, community support, and compatible components, making troubleshooting far easier for a first time user compared to other boards.
How is Arduino different from microcontrollers used in GATE or SSC JE syllabus topics?
Underlying concepts, such as interfacing, memory, and input output handling, are the same. Arduino simply wraps these concepts in beginner friendly functions, while exam syllabus content often discusses them at a more theoretical or register level, which you can explore further once comfortable with Arduino basics.
Can Arduino projects actually help during placement interviews for embedded roles?
Yes, a well understood Arduino project demonstrates that you can translate theoretical embedded systems knowledge into a working circuit, which can give interviewers evidence that you can apply embedded concepts in practice. The depth of the project and your understanding of the design decisions generally matter more than the specific development board used.
What is the most common mistake beginners make during their first arduino embedded system setup?
Yes, a well understood Arduino project demonstrates that you can translate theoretical embedded systems knowledge into a working circuit, which can give interviewers evidence that you can apply embedded concepts in practice. The depth of the project and your understanding of the design decisions generally matter more than the specific development board used.